Was ist Mopidy überhaupt ? Mopidy ist ein „Music Player Daemon“ – in kurz ein MPD Server, welcher Music sowohl lokal aber auch streamen kann.
So kann man zum Beispiel ein Raspberry Pi nehmen, Lautsprecher anschließen und die Software installiere. Und schon hat man ein Musikspieler den man per Webinterface oder auch Handyapp fernsteuern kann.
Mittlerweile gibt es auch viele Integrationen wie zum Beispiel für Spotify, Soundcloud, Youtube, Radio, iTunes etc. sodass man auch Musik von dort einbinden kann.
Eine kleine Auflistung der verschiedenen (sehr kreativen!) Werke findet man hier: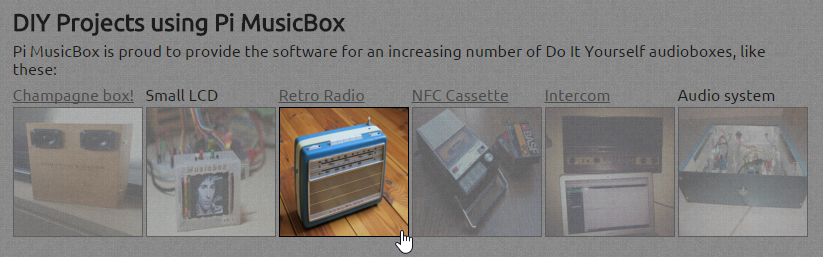
Ich habe hier eine kurze Anleitung geschrieben, wie ihr Mopidy auf eurem Raspberry Pi (oder auch jedem anderem Ubuntu System) installieren könnt und die Grundkonfiguration vornehmt.
1. Das offizielle APT Repository von Mopidy seinem System hinzufügen.
wget -q -O - https://apt.mopidy.com/mopidy.gpg |sudo apt-key add -
sudo wget -q -O /etc/apt/sources.list.d/mopidy.list https://apt.mopidy.com/jessie.list
2. Mopidy installieren. Ich habe zusätzlich noch die Spotify Erweiterung (mopidy-spotify) installiert. Eine Übersicht der Web-Extensions, sowie die Installationsanleitung findet ihr hier.
apt-get update && apt-get dist-upgrade && apt-get install mopidy mopidy-spotify

3. Mopidy das erste Mal starten. Einfach Ausführen, damit werden alle notwendigen Verzeichnisse und die Standard Konfiguration erzeugt.
pi@raspberrypi:~ $ mopidy
INFO Starting Mopidy 1.1.1
INFO Loading config from builtin defaults
INFO Loading config from command line options
INFO Creating dir /home/pi/.cache/mopidy
INFO Creating dir /home/pi/.config/mopidy
INFO Creating dir /home/pi/.local/share/mopidy
INFO Loading config from builtin defaults
INFO Loading config from command line options
INFO Creating file /home/pi/.config/mopidy/mopidy.conf
INFO Initialized /home/pi/.config/mopidy/mopidy.conf with default config
INFO Enabled extensions: mopify, mpd, http, moped, stream, m3u, material-webclient, softwaremixer, file, local
INFO Disabled extensions: spotify
WARNING Found spotify configuration errors, the extension has been automatically disabled:
WARNING spotify/username must be set.
WARNING spotify/password must be set.
WARNING Please fix the extension configuration errors or disable the extensions to silence these messages.
INFO Starting Mopidy mixer: SoftwareMixer
INFO Starting Mopidy audio
INFO Starting Mopidy backends: StreamBackend, M3UBackend, FileBackend, LocalBackend
INFO Audio output set to "autoaudiosink"
INFO Creating dir /home/pi/.local/share/mopidy/m3u
INFO Loaded 0 M3U playlists from /home/pi/.local/share/mopidy/m3u
INFO Creating dir /home/pi/.local/share/mopidy/local
INFO No local library metadata cache found at /home/pi/.local/share/mopidy/local/library.json.gz. Please run `mopidy local scan` to index your local music library. If you do not have a local music collection, you can disable the local backend to hide this message.
INFO Loaded 0 local tracks using json
INFO Starting Mopidy core
INFO Starting Mopidy frontends: QueueManagerFrontend, MpdFrontend, HttpFrontend
INFO MPD server running at [::ffff:127.0.0.1]:6600
INFO HTTP server running at [::ffff:127.0.0.1]:6680
4. Stoppen und Konfiguration anpassen
Mit STRG+C beenden wir wieder den Mopidy Server und passen jetzt die Konfiguration an, sodass wir den Server aus unserem Netzwerk aus erreichen können.
vi /home/pi/.config/mopidy/mopidy.conf
Hier passen wir den Hostname von 127.0.0.1 auf 0.0.0.0 an, welche für alle IP-Adressen des Pi steht.
Wer Spotify benutzt muss an dieser Stelle noch die Zugangsdaten seines Premium Account eintragen. Die restlichen Einstellungen ergeben sich eigentlich.
[mpd]
enabled = true
hostname = 0.0.0.0
port = 6600
[http]
enabled = true
hostname = 0.0.0.0
port = 6680
Ihr könnt Mopidy auch über folgende Befehle kontrollieren:
sudo service mopidy start
sudo service mopidy stop
sudo service mopidy restart
5. Mopidy Webinterface aufrufen
Wenn Mopidy gestartet ist, könnt ihr das Webinterface über den oben eingestellten Port (Standard = 6680) erreichen. Also:
http://raspberryIP:6680
Ihr habt dann eine Auflistung aller installierten Webinterfaces und könnt loslegen !